
The Best KVM Switches for Sharing a 144Hz Monitor Between Work and Gaming Laptops
You live a double life. By day, you are grinding through spreadsheets and code on a highly restrictive corporate MacBook or Dell Latitude. At 5:00 PM, that same desk is supposed to transform into a high-octane battlestation powered by a massive custom-built PC to push 144 frames per second on a 1440p or 4K ultrawide monitor.
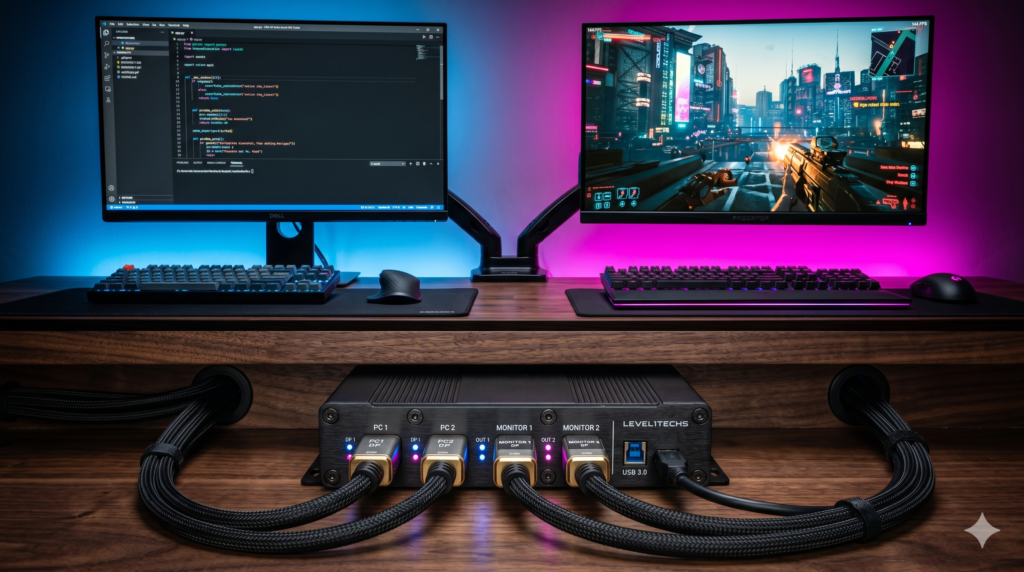
The aesthetic dream is a pristine, single-desk setup. You want to use one premium mechanical keyboard, one high-end gaming mouse, and one glorious gaming monitor for both systems. But the reality is a daily physical nightmare. Every evening, you have to crawl under your desk, violently ripping the DisplayPort cable, mouse USB, and webcam out of your work laptop dock to plug them into your gaming rig. It ruins your cables, damages your motherboard ports, and destroys the sleek vibe of your workspace.
At Desk & Console, we treat WFH/Gamer hybrid setups as serious data engineering. If you want the dream setup—hitting exactly one button to swap your high-refresh-rate monitor and peripherals without sacrificing a single millisecond of competitive gaming performance—you must understand video bandwidth protocols and EDID emulation. Here is the ultimate technical guide.
The Technical Reality of KVM Switching
A KVM switch is essentially a digital tollbooth. Every pixel your graphics card generates must pass through the KVM’s internal chips. If the tollbooth isn’t wide enough, the data crashes. To share a 144Hz monitor safely, your switch must support DisplayPort 1.4 or HDMI 2.1.
🧮 Bandwidth Math: DisplayPort 1.4 vs. HDMI 2.0
Running a high-refresh-rate monitor requires immense continuous data pipelines without color compression. Here is the raw data your monitor requires:
• 4K (UHD) @ 144Hz = ~31.35 Gbps
A standard HDMI 2.0 KVM maxes out at roughly 18 Gbps. It barely passes 1440p 144Hz, and fails instantly at 4K. A premium DisplayPort 1.4 KVM provides a massive 32.4 Gbps pipeline. This guarantees you can hit 144Hz (or even 240Hz) with zero compression, zero screen flickering, and perfect color depth.
🧠 EDID Emulation: Stop the “Window Shuffle”
If you’ve ever used a cheap KVM, you know the ultimate frustration: When you switch from your work laptop to your gaming PC, your laptop thinks the monitor was violently unplugged. Windows panics and shoves all your meticulously arranged spreadsheets onto your tiny laptop screen.
Premium KVMs feature an internal hardware chip dedicated to EDID Emulation (Extended Display Identification Data). This chip constantly sends a “fake” monitor connection signal to the inactive PC. Your work laptop thinks the monitor is still perfectly connected even while you game, guaranteeing your windows never rearrange.
| Performance Metric | Cheap Office KVM ($30) | Premium DP 1.4 KVM ($150+) |
|---|---|---|
| Max Refresh Rate | Locked at 60Hz (Choppy) | 144Hz / 240Hz (Raw Passthrough) |
| Mouse Input Lag | Severe (Software USB Emulation) | Zero (Hardware USB 3.0 Hub) |
| Window Resizing | Constant (No EDID) | None (EDID Emulators built-in) |
The Best High-Refresh KVM Switches
To safely bridge the gap between a corporate workstation and an esports-grade gaming rig without bottlenecking your frame rate, you must use one of these enterprise-grade routing solutions.
1. TESmart DisplayPort 1.4 Dual Monitor KVM 🏆 Best Overall
If you run a true dual-monitor battlestation and want to solve the WFH dilemma permanently, the TESmart Dual Monitor DP 1.4 KVM is the undisputed champion of the high-end enthusiast community.
This heavy-duty metal chassis requires two DisplayPort cables from your Work Laptop (via a dock) and two from your Gaming PC. With a tap of a button on the front panel (or via the included remote control), both monitors, your keyboard, mouse, and headset seamlessly jump from one PC to the other. Most importantly, it features dedicated USB 3.0 passthrough ports, ensuring your 1000Hz gaming mouse’s polling rate is preserved with zero input lag.
Check Price on Amazon2. AV Access 8K DisplayPort 1.4 KVM Switch
If you only have a single monitor to share, but that monitor is an absolute behemoth (like a 4K 144Hz OLED or a 49-inch Super-Ultrawide), you cannot risk a bandwidth choke. The AV Access 8K KVM Switch delivers flawless single-monitor performance.
AV Access is renowned in the AV integration industry. Their KVM operates entirely via hardware passthrough, meaning there is zero software emulation causing input lag. You plug your gaming PC and work laptop into the back, and tap the included wired desktop remote to flip the screen over. It natively supports FreeSync and G-Sync, ensuring your variable refresh rate technology remains perfectly active when connected to your gaming rig.
Check Price on Amazon3. Sabrent 2-Port USB Type-C KVM Switch
If you don’t own a desktop PC, and your setup consists of sharing monitors between a Work Laptop (like a MacBook) and a Gaming Laptop, the Sabrent USB Type-C KVM is a cable-management miracle.
This tiny aluminum switch utilizes the massive bandwidth of Thunderbolt/USB-C Alt Mode. It supports 4K at 60Hz (or 1440p at 144Hz) perfectly. Most importantly, it pushes up to 60W of Power Delivery directly through the same cable carrying your video signal. Your desk instantly transforms from a rat’s nest of thick black cables into a pristine surface with just two sleek USB-C cords.
Check Price on Amazon4. The Budget Hack: UGREEN USB 3.0 Peripheral Sharing Switch
We realize that true DisplayPort 1.4 KVMs are a heavy investment. If you are on a strict budget, you can manually recreate the KVM experience using the UGREEN USB 3.0 Switch.
This is a Peripheral-Only Switch. It does not touch your video signal. When 5:00 PM hits, you press the button on the UGREEN switch to instantly transfer your mechanical keyboard and gaming mouse to your Gaming PC. Then, you simply reach up to your monitor’s buttons and manually switch the input source from HDMI to DisplayPort. It takes two physical actions instead of one, but it saves you hundreds of dollars while guaranteeing zero video input lag.
Check Price on Amazon5. Mandatory Cart-Stuffer: Silkland VESA Certified DP 1.4 Cables
This is the most common reason KVM setups fail. You cannot buy a $200 KVM switch and try to wire it with cheap cables. The massive 32.4 Gbps bandwidth required to push 1440p at 144Hz demands heavily shielded, certified wiring.
When you order your KVM, you must add Silkland VESA Certified DisplayPort 1.4 Cables to your cart. They are officially certified by the VESA organization to guarantee 8K at 60Hz and 4K at 144Hz without signal degradation. Ensuring the copper integrity of every link in the KVM chain is mandatory for a flicker-free stream.
Check Price on AmazonEnding your workday shouldn’t require 5 minutes of crawling under your desk to manually swap cables. By investing in the uncompromised DisplayPort 1.4 bandwidth of the TESmart or AV Access KVMs (and wiring them with VESA-Certified cables), you achieve the ultimate setup: Hitting a single button to banish your spreadsheets and instantly illuminate your high-refresh gaming world with zero input lag.
Frequently Asked Questions (FAQ)
Does a KVM switch cause input lag?
If you use a cheap, $30 office-grade KVM switch, yes. Cheap KVMs actively process the USB signal using internal software “emulators” (to listen for keyboard hotkeys). This intercepts your gaming mouse data and locks its polling rate to a terrible 125Hz. Premium DisplayPort 1.4 KVM switches use raw hardware passthrough. By plugging your mouse into the dedicated USB 3.0 port on the KVM, it preserves your 1000Hz polling rate with absolutely zero added latency, making it safe for competitive esports.
How do I share a 1440p 144hz monitor between two computers?
To share a high-refresh-rate monitor, you cannot use standard HDMI 2.0 KVMs. You must purchase a dedicated DisplayPort 1.4 KVM switch. Connect the DisplayPort outputs of your gaming PC and your work laptop dock into the KVM inputs, and run a final DisplayPort cable from the KVM to your monitor. This provides the massive 32.4 Gbps bandwidth required to maintain 144Hz at 1440p or 4K resolution.
Why do my windows move and resize when I use a KVM switch?
When you switch inputs on a cheap KVM, it physically severs the connection to the inactive PC. Windows thinks the monitor was unplugged, so it shoves all your open apps onto your laptop screen. Premium KVMs feature ‘EDID Emulation,’ a hardware chip that tricks the inactive PC into thinking the monitor is still perfectly connected, keeping your windows perfectly in place so your workflow isn’t destroyed when you return.