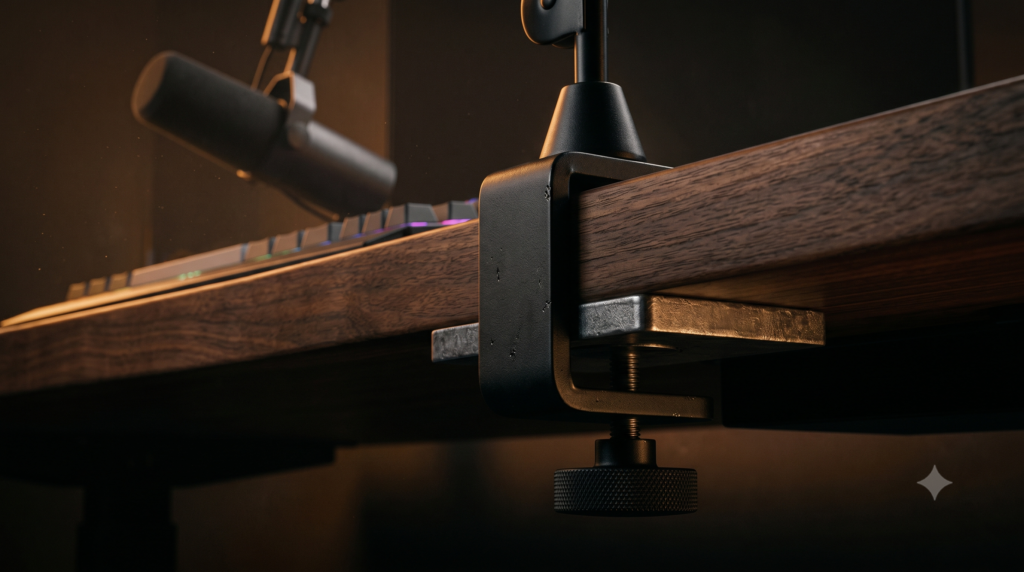
How to Mount a Heavy XLR Mic Arm Without Damaging Your Desk
You’ve finally built the perfect creator battlestation. You dropped $400 on an elite broadcast microphone—like the Shure SM7B or Electro-Voice RE20—and paired it with a heavy-duty steel boom arm. You securely tighten the metal C-clamp to the back of your desk, adjust the microphone toward your face, and start recording.
A few days later, you notice your mic arm is leaning slightly. You tighten the clamp again. A week later, you try to rotate the mic and hear a sickening crack. You look under the arm and your stomach drops. The metal C-clamp has brutally crushed the veneer of your desk, punching a permanent, jagged hole straight through the top. Your heavy mic arm is actively destroying your workspace.
At Desk & Console, we treat battlestation construction like structural engineering. You cannot attach heavy, dynamic payloads to fragile surfaces without understanding mechanical torque. Whether you have a hollow-core desk, a fragile glass tabletop, or just want to protect your solid wood from permanent scratches, here is the exact hardware you need to reinforce your desk for a boom arm.
The Physics of Desk Damage (Torque and Point-Load)
The damage isn’t caused solely by the weight of the microphone; it is caused by the physics of Leverage.
📐 The “Moment Arm” Leverage Effect
A Shure SM7B microphone weighs roughly 1.7 lbs. A premium steel boom arm weighs roughly 3 lbs. That is only 5 lbs of total weight. However, when you extend that arm 30 inches out toward your face, you create a massive lever. The physical torque exerted at the base of the clamp multiplies exponentially.
A standard C-clamp focuses all of that twisting force into an area no larger than a silver dollar. On a solid butcher block desk, this might just leave an ugly circular scratch. But on a glass desk, this point-load stress will instantly shatter the pane. On a hollow honeycomb desk, it will crush the surface like an eggshell.
| Desk Material | Standard C-Clamp Reaction | Required Mounting Solution |
|---|---|---|
| Solid Wood / Butcher Block | Surface scratches and circular dents | Rubber Padding or Grommet Mount |
| Hollow-Core (IKEA Linnmon) | Crushes veneer, punctures core | Steel Reinforcement Plates (Mandatory) |
| Tempered Glass | Instant shattering under torque | Steel Reinforcement Plates (Mandatory) |
The Structural Armor & Premium Boom Arms
To safely float a heavy broadcast microphone, you must pair architectural reinforcement with an arm that utilizes heavy-duty tension springs rather than cheap friction locks.
1. The Mandatory Fix: WALI Steel Desk Reinforcement Plate 🛡️ Desk Insurance
If you have an IKEA desk, a glass desk, or a cheap particleboard desk, you absolutely must buy this item before you mount a mic arm. It is a $20 insurance policy for your entire battlestation.
The WALI Steel Reinforcement Kit includes dense EVA foam pads that stick to the metal plates, ensuring the steel itself doesn’t scratch your desk. By expanding the footprint of your C-clamp, this plate literally prevents the clamp from biting into the hollow honeycomb interior. It provides an incredibly rigid, rock-solid base that stops your mic arm from leaning or wobbling while you type.
Check Price on Amazon2. The Heavy-Duty Standard: Rode PSA1+ Professional Boom Arm
If you watch any high-end podcaster or top-tier Twitch streamer, you will see the Rode PSA1+. It is the absolute gold standard for heavy broadcast microphones.
Beyond its legendary internal spring system, it solves the desk-damage problem perfectly. The C-clamp on the PSA1+ is significantly wider than cheap budget arms, and it is heavily padded with premium rubber to prevent desk scarring. Furthermore, it comes bundled with a dedicated Grommet Desk Mount. If you want the ultimate, safest structural setup, you can drill a hole through your desk and drop the arm directly into it, bypassing the dangerous C-clamp entirely.
Check Price on Amazon3. The Monitor Bypass: Elgato Wave Mic Arm (Low Profile)
If you want a flawless, uncluttered battlestation aesthetic, towering mic arms often ruin the vibe by blocking your view of your secondary monitor. The Elgato Wave Mic Arm LP solves both visual clutter and mechanical desk strain simultaneously.
It utilizes a heavy-duty, all-metal C-clamp equipped with thick, protective rubber padding. Instead of pointing up, the arm sweeps out horizontally, hovering inches above your mechanical keyboard and slipping perfectly underneath your main gaming monitor. Because it does not use a towering fulcrum point, it exerts significantly less aggressive leverage against the edge of your desk compared to standard tall arms. This is the absolute best heavy duty mic arm for a thin desk.
Check Price on Amazon4. The Tube Aesthetic: Logitech Blue Compass Premium Arm
For creators who prioritize visual cleanliness on camera, the Logitech Blue Compass is an architectural beauty. It eschews the classic “scissor-arm” look for a sleek, single-tube design with hidden internal tension hinges.
Because it is designed specifically for the famously heavy Blue Yeti microphone, the tension hinges require significant force to move. This makes it incredibly stable, but it also means pulling the arm toward you exerts high torque on the desk clamp. It comes with an integrated C-clamp and an included desk grommet adapter, giving you the flexibility to drill it directly through the center of your desk for maximum structural safety.
Check Price on AmazonSafe Installation Guide: Grommet vs. C-Clamp
Premium mic arms often come with two different mounting options in the box. Choosing the correct one—and installing it properly—is critical to the survival of your desk.
When to use the Grommet Mount (The Permanent Fix)
If you have a solid wood butcher-block desk (like an Ikea Karlby) and you want your mic arm to emerge cleanly from the very back-center of your desk, you must use the Grommet Mount. You physically drill a 3/8″ hole directly through the wood (or utilize a pre-existing desk cable hole). A heavy steel bolt passes through the desk and locks into the mic arm base. This creates an incredibly strong, permanent architectural anchor that will never slip, sag, or damage the desk edge. (Note: Do not drill a grommet mount into hollow-core cardboard desks, as tightening the bolt will crush the desk from the inside out.)
When to use the C-Clamp & Steel Plate
If you have a hollow-core desk or simply do not want to drill holes into your solid wood, the C-Clamp is your best option. However, never clamp bare metal to hollow wood or glass. Lay the WALI Steel Reinforcement Plate flat on the edge, slide the C-Clamp over the steel, and tighten the jaw from underneath.
Torque Safely & Mount the Mic Last
Stop tightening the clamp the moment it feels immovable; over-torquing will warp the internal screw. Crucial Step: Always insert the boom arm into the clamp, attach your heavy microphone to the end of the arm, and only then adjust the tension screws to balance the weight. Premium arms are balanced for heavy payloads and will violently spring open if you adjust them while empty.
A premium $400 broadcast microphone is useless if it’s attached to a broken desk. By acknowledging the fragile nature of modern desks and utilizing the WALI Steel Reinforcement Plate beneath a legendary arm like the Rode PSA1+, you instantly transform a dangerous clamping hazard into a rigid, silent, and structurally flawless recording environment.
Frequently Asked Questions (FAQ)
Why is my mic arm crushing my IKEA desk?
Desks like the incredibly popular IKEA Linnmon or Lagkapten are not made of solid wood; they use a hollow-core, paper-honeycomb interior to save weight and cost. When you tighten a mic arm C-clamp, you apply extreme point-load stress to a tiny 2-inch area. Over time, the leverage of the heavy mic arm will effortlessly crush the thin outer veneer and punch a hole straight through the honeycomb core. You must use steel plates to distribute the load.
How do you reinforce a desk for a boom arm?
To reinforce a thin, glass, or hollow-core desk, you must purchase a set of heavy-duty steel desk reinforcement plates. You place one steel plate on top of the desk and one underneath, effectively sandwiching the desk between them. When you tighten the C-clamp onto the metal plates, it distributes the crushing force over a massive 11-inch surface area, completely preventing dents, warping, and cracking entirely.
Grommet mount vs C-clamp mic arm: which is better?
A C-clamp mounts to the outer edge of your desk, which is convenient but applies severe rotational torque to the lip. A grommet mount requires drilling a hole directly through your desk (or using an existing cable routing hole). Structurally, a grommet mount is vastly superior and much cleaner aesthetically, as it anchors the arm securely through the center of the desk with perfect 360-degree weight distribution rather than hanging off the edge like a lever.