How to Cable Manage Your Gaming Desk Like a Pro (Setup Wars Guide)
You’ve spent hundreds (or thousands) of dollars building your dream gaming PC, unboxing ultra-wide monitors, and dialing in the perfect RGB lighting. But when you step back to admire your work, you are met with a horrifying sight: a chaotic, tangled waterfall of black wires spilling off the back of your desk onto the floor.
If you’ve ever watched shows like TechSource’s legendary YouTube series Setup Wars, you know that the holy grail of PC building is the “Floating Desk Illusion.” This is the gold standard where absolutely zero cables are visible to the naked eye. It looks incredibly expensive and professional, but it’s actually incredibly cheap and easy to do yourself.
At Desk & Console, we are obsessed with clean aesthetics. In this guide, we are revealing the ultimate step-by-step framework to cable manage your setup like a professional, along with the exact, inexpensive Amazon gear you need to achieve the coveted “Seal of Approval.”
1 Mount Your Power Strip
The biggest amateur mistake in cable management is leaving your power strip on the floor. If your power strip is on the floor, every single device on your desk has to stretch a cable down to reach it. That creates the dreaded “spider web” effect.
The Fix: Use industrial double-sided mounting tape to stick your surge protector directly to the underside of your desk top. By doing this, all your short peripheral cables (monitor power, RGB strips, speaker wires) plug in directly under the wood, and never have to drop to the floor. Only one cable (the power strip’s plug) goes to the wall.
2 Install an Under-Desk Raceway
Once your power strip is mounted under the desk, you are going to have a lot of excess cable slack hanging down. You need a “highway” to hide these wires. This is where an under-desk cable management tray (or raceway) comes in.
Screw or clamp a wire tray directly behind or next to your mounted power strip. Take all the extra slack from your mouse, keyboard, monitor, and power cables, bundle them up, and toss them into the tray. Now, everything is hidden securely behind the lip of your desk.
Zip ties are the enemy of gamers. The moment you need to replace a broken mouse or move a monitor, you have to break out scissors and risk accidentally snipping your expensive braided wires. Always use Velcro Cable Ties. They are reusable, adjustable, and much softer on delicate cables.
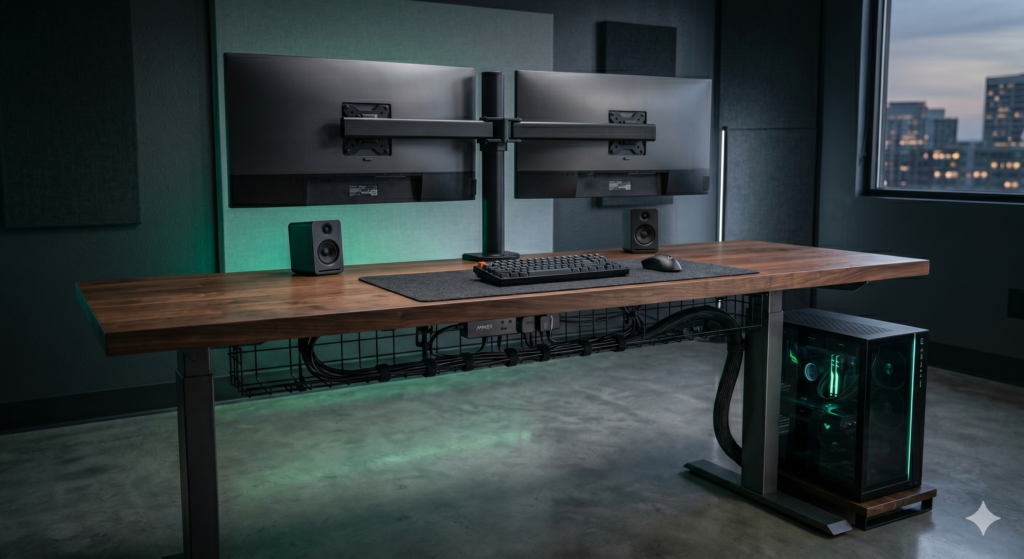
3 The “Umbilical Cord” Method
By this point, the only wires visible should be the ones traveling from your under-desk tray down to your PC tower, and the single main power cord going to the wall outlet.
To eliminate these last few cables, group them tightly together and wrap them in a braided cable sleeve. Instead of seeing 5 messy wires drooping down to your PC, you will see one single, clean, professional-looking black tube. This is the secret to achieving that flawless Setup Wars aesthetic.
The Ultimate Cable Management Gear List
You cannot achieve a flawless setup with just scotch tape and a dream. Here is the professional “starter kit” of highly-rated Amazon products that top tech creators use to route their setups.
VIVO Under Desk Cable Management Tray
This is the foundation of your clean setup. The VIVO Cable Tray provides a massive 17-inch metal shelf that easily mounts to the underside of any wooden desk. Unlike enclosed plastic channels, this open-wire design allows you to route cables in and out at any point, and provides excellent airflow for bulky power bricks to prevent overheating.
✓ What We Love
- Extremely sturdy solid metal construction
- Easily holds heavy laptop chargers and power bricks
- Open design prevents heat buildup from adapters
✕ Keep in Mind
- Screwing it in requires a wood desk (at least 5/8″ thick)
- Slightly bulky if you have a very shallow desk
Alex Tech 10ft Expandable Braided Cable Sleeve
If you have a standing desk, or if your PC is on the floor, you need this sleeve. The Alex Tech Braided Sleeve is split down the middle and naturally curls back onto itself. You simply pry it open, stuff your display ports, USB hubs, and power cables inside, and let it close. It turns a nightmare web of cords into a single, sleek, automotive-grade tube.
✓ What We Love
- Split design means you don’t have to unplug cables to wrap them
- Expandable mesh holds up to 5-6 standard cables
- Extremely cheap, effective, and pet-proof
✕ Keep in Mind
- If you cut it, you must singe the edges with a lighter to prevent fraying
VELCRO Brand ONE-WRAP Cable Ties (100 Pack)
Never buy plastic zip ties again. This 100-pack of incredibly strong Velcro ONE-WRAP Ties is the cheapest and most effective upgrade you can buy for your desk. Use these to strap your monitor cables directly to your monitor arm, bundle slack inside your cable tray, and route your mouse/keyboard wires neatly across the back edge of your desk.
✓ What We Love
- Infinitely reusable (makes upgrading peripherals easy)
- Won’t pinch or damage cables like plastic zip ties
- Incredibly cheap for a massive pack of 100
✕ Keep in Mind
- Dust can eventually collect in the velcro hooks if dropped on the floor
Frequently Asked Questions (FAQ)
How do you hide monitor cables on a desk?
The cleanest way to hide monitor cables is to ditch the factory monitor stand and use an aftermarket VESA monitor arm. Route the display and power cables directly down the hollow spine of the monitor arm, secure them with velcro straps, and drop them straight into your under-desk cable tray.
How do I cable manage a glass gaming desk?
Because you cannot drill metal trays into a glass desk, you must use heavy-duty double-sided tape (like 3M VHB or Gorilla Tape) to mount lightweight plastic J-channel raceways to the metal frame of the desk. You can then route cables tightly along the metal table legs using adhesive clips to keep them hidden from the front.
What is the “Seal of Approval” standard in cable management?
Popularized by YouTube shows like Setup Wars, the ‘Seal of Approval’ standard means absolutely zero cables are visible from a standing or sitting position. Everything is routed underneath the desk or hidden behind the PC case, creating a pristine, wireless ‘floating’ illusion.
Cable management isn’t a dark art—it is just about having a system. Get your power strip off the floor, utilize the hidden space beneath your desk, and bundle trailing wires together. Grab the gear listed above, set aside a Saturday afternoon, and transform your messy battlestation into a true masterpiece!